Saturday, 26 February 2011

Rockers ready to go

After spending £432 on the car yesterday, today has thankfully been a bit less eventful. When Steve came round last weekend, I showed him the rocker assembly (the bit on top of the cylinderhead, for my American readers) and it was deemed to be reusable but required some re-finishing to the bottoms of the rockers themselves so that you can get an accurate setting with a feeler guage because it's actually resting on the surface between the rocker and valve, not on the ridges either side.

I set up shop on the dining room table again (the venue for rebuilding the carbs last Saturday) and sorted the problem out. Here are the before and after pics:


Photobucket
I forgot to take a proper 'before' photo but you can see the four on the right-hand side have visible wear marks on them.


Photobucket

The job nearly finished - each rocker is now smooth to the touch and they have very little in the way of visible wear. A couple may have a very slight mark on the surface but I think they're good enough.

Friday, 25 February 2011

Pictures of cracked head

Nipped over to HRD today to drop the block off with them, thankfully my replacement pistons were given a clean bill of health, and then from there onto Ivor Searle.

I picked up the new cylinderhead and starter ring, as well as a set of bolts to hold my engine on the engine stand.

Here are a couple of pictures of my cracked head - apparently a crack in this place is fairly rare. Lucky me!


Photobucket


Photobucket

The block should be ready within a week and although I've left the crank and camshaft in the engine, they're going to be removed and I'll get just the block back with the rest of the kit in a box, ready for reassembly.

While it's there, the block and associated parts are all going through the parts washer, which is something I don't have the ability to do.


Tuesday, 22 February 2011

Engine news: a bit of a set back.

I got a call from Ivor Searle yesterday - not good news. My polished and ported cylinderhead is unfortunately cracked and therefore now a polished and ported door-stop. This is a bit of a shame. Apparently the crack is not in the usual place for these heads but somewhere between the valves. To tell you the truth I was so annoyed when I was being told that I didn't catch exactly where it was.

Anyway, the net result of this is that I've decided to go for a brand new (not remachined) cylinderhead from Ivor Searle which I'll pick up along with the flywheel with new starter ring fitted.

The story continues a bit with the engine block - it's off to HRD in Witchford tomorrow for a rebore. I was quoted £250 for a set of replacement pistons which I thought a little steep so I've found a second-hand set from a low mileage engine which will hopefully foot the bill.

Speaking of bills, hopefully this won't set me back too much but it'll be at least as much as the cost of the car in the first place. Oh well, it'll be worth it when it's done!

Sunday, 20 February 2011

Dismantling the Block

My partner's father came round today to have a look at the MGB's block and assess the general conditon of things.

There's both good news and bad news: the bottom end if the engine is in pretty good condition but the bores are more worn than I originally appreciated.

We decided to leave the crank shaft installed as the bearings were in good conditon with no movement and very little end-float. The camshaft was also in serviceable condition and remained in situ, but we removed the pistons to get a good look at the bores. You can see in the photograph below, taken upwards through the engine, the silver edge of the ridge that the pistons have made in the bore. Steve thought that this might result in the engine being smokey so it was decided that we'd get something done.

I'm going to get the block cleaned and re-bored and also then get hold of a set of over-size pistons and rings. This is probably another trip to Ivor Searle, although there's also a place in Witchford that I'm going to check out.

In a way it's a shame to have to spend more cash, but at the end of it the engine will be about three quaters reconditioned so with any luck I won't need to do anything to it for a good long time.

Photobucket


Photobucket


Photobucket

Saturday, 19 February 2011

Carburettor Overhaul

I spent a few happy hours today overhauling the two SU HS4 carbs today. It was a cold rainy day so rather than spend the day in the garage, I took them indoors and sat at the diningroom table.

It wasn't a difficult job, the only tricky bit was getting one of the linkage springs back in to position but I have a pair of spare carbs that came with the car so I could use them to see how everything went back together.

I had previously bought a pair of overhaul kits from SU which contained all the seals and gaskets that I'd need and also instructions on what goes where.

Here are the pics of today's work...


Photobucket

The carbs as they came off the car


Photobucket

A handy shot of how the linkages fit, and an idea of the filth!


Photobucket

The first one dismantled and cleaned prior to rebuilding


Photobucket

One done, one to go!


Photobucket

A nice pair.


Photobucket

Looking a lot cleaner.

Tuesday, 15 February 2011

Spending hopefully nearly over...

While carying out the engine work lately, I've been making a list of items that need replacement and have hopefully just bought the last of the big lists of items.

My policy has been to replace any safety-critical items, so I've bought parts to completely renew the brake and clutch system, even though some parts may well have been re-useable. Elsewhere I've decided to replace parts where doing so will probably increase reliablility when the car is back in service. Also, in the interestes of both safety and reliability I've replaced all locking devices and seals / gaskets.

There's a post right down near the start of the blog in 2010 ---->Here<----- which I've been updating to keep track of expenditure. Currently the whole project has cost about £870 which includes the cost of the car in the first place. As I said above, hopefully the list will not grow too much more, although that reminds me - I need to buy a new temperature guage, possibly a fuel tank, interior items, tyres... Damn - maybe I've spoken a little too quickly. Maybe it's safe to say that the majority of the mechanical items are now purchased!!

The next major milestone in the project will be taking the head to get it checked-over and the valve-seats replaced which I intend to do later on this week.

Sunday, 13 February 2011

More dismantling & Core plugs out.

Spent a happy couple of hours in the garage today, taking the remaining bits off the engine block:

-Clutch
-Flywheel
-Gearbox Adaptor Plate
-Alternator bracket
-Distributor
-Oil Cooler hose
-All 4 Core Plugs.

I finally got to remove the one part that stopped this car from running those 12 years ago:


Photobucket

I was quite pleased to find that this core plug was in such a poor state. The friend who sold me the car in the first place told me that it had leaked but that he couldn't get to it to replace it without removing the engine. The circular hole is where I pushed a screwdriver into it trying to demonstrate to my partner that it was knackered. I didn't expect to be able to push right through it!! The hole was initially quite small so I'm not as concerned as I was about the car being driven home with this leak.

Photobucket


The engine block will need to be flushed out because there was LOT of crud behind all four core plugs. Actually, there was / is a lot of crud in the cooling system in general, I think it's both rust and also old coolant; the water pump was very gummed up with whiteish crusty stuff but the engine block itself seems to be mainly full of rusty flaky stuff. I'll get the pressure washer onto it before it goes back together. I don't want all that crud in the radiator!

I also spent quite a long time scraping remains of the headgasket from the cylinderhead.

Friday, 11 February 2011

Cleaner Engine and update

I've spent a little time degreasing the engine block in the past evening, it's looking a little better now:

Photobucket

I've also spoken to Ivor Searle and have approximate costs for the work that I'd like done - £165 will see the cylinderhead convereted to unleaded, and checked for cracks, also I'm going to get a new starter ring fitted to the flywheel as the current one is a little worn:

Photobucket

All in all things are progressing OK...

Tuesday, 8 February 2011

Off with its head!

After a post on the MG Experience forum and lots of friendly advice, I decided to remove the cylinderhead to have a little look inside. I thought it worth the extra work to verify that all's well in there and also get the head pressure tested. Of course, while it's off and at the local engine specialist (Ivor Searle) it might as well be converted to unleaded.

Everything looked to be in pretty good condition once the head was off, the pistons don't seem show any movement at all in the bores and the bores themselves appear to be in fine condition with no visible wear at all.

The head is showing a few areas of corrosion, especially in the middle two cylinders and there's that bit of corrosion in the front inlet port but in all it appears to be fine (at least of the up to as many as 5 other heads I've examined in my life, this one's not all that different!!!)

Here are some photos:


Photobucket


Photobucket


Photobucket


Photobucket


Photobucket


Photobucket


As you can see, the old head gasket stuck like glue to the mating face of the cylinderhead which is a pain, but hopefully won't take long to clean it off...

There is a gallery of high-res pictures here.

Monday, 7 February 2011

A bit of minor engine dismantling

Didn't have a lot of time this evening but did manage to:

Put engine on work bench
Remove clutch (appears to be about half worn)
Remove carbs
Remove manifolds
Remove pesky temperature sender thing

I LOVE working on this engine. I've never known an engine where all the nuts come off the studs without any bother and nothing shears off. Actually one of the studs had sheared off in the past but not in this cylinderhead! It was obviously re-used last time the manifolds were replaced because there was just enough thread left to make it useful.

The only area of possible concern is corrosion in the front inlet of the cylinderhead. It's hopefully just from being stored and not run but given the fact that this engine ended up not being run in 12 years due to a large loss of coolant, and was actually driven home with coolant running out of it, I'm half expecting trouble!

Here's the area in question:


You can see it in some of the other photos from tonight:

Before


After - take a look in that inlet port.

I must clear the bench tomorrow so that I can spread the MG parts out a bit.

Sunday, 6 February 2011

Major Progress: Engine Out.

I had one thing I wanted to do this weekend: restart work on the MG after a winter break. My plan was to start bright an early on Saturday morning but sadly a good night out on Friday, a mechanical failure on our every-day car, and then an impromptu celebration of the Chinese New Year, meant that Saturday was a write-off.

So the job was begun on today (Sunday) at about 3pm - about 2 and a half hours before it was due to be dark.

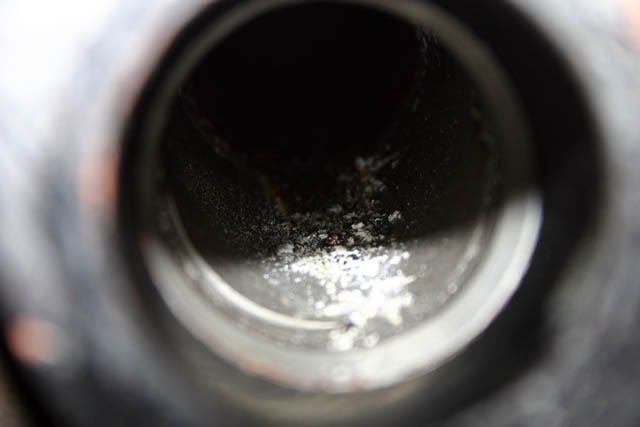
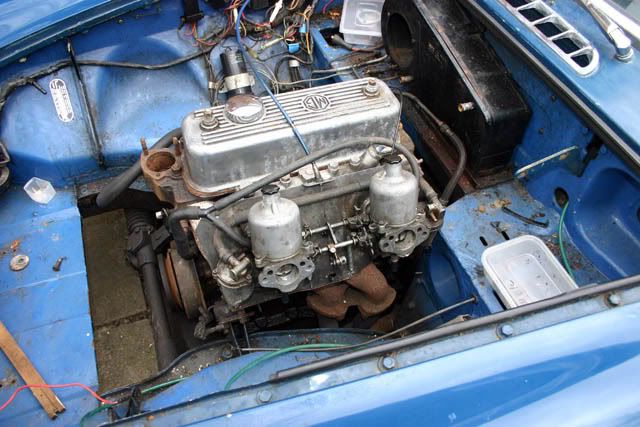
Here's the before picture:


Usually you hear classic car owners curse and swear about the car's previous owners but today it was quite the opposite: not a single nut, bolt or fastening was stuck, rusted or in any way troublesome, and as a result nothing sheared off, rounded or caused any skinned knuckles!

I knew it was going to be a good day when I jacked the car up, stood it on axle stands and tried a socket on one of the brass manifold/downpipe clamp nuts. It wasn't much more than finger tight and within about 10 minutes, all 6 were removed.

There's not a lot more to report, really, most of the engine bay was already stripped out anyway so just as it was a case of checking a few things, removing the odd part, such as the starter motor and distributor electrics, supporting the gearbox and undoing the nuts and bolts securing the engine to the gearbox bellhousing.

One really encouraging sign was that I had time today to poke around the underneath of the car and can report that there's a very liberal coating of Waxoyl slathered all over every part. It looks a bit scrappy and uneven but now that I know that it's just thick rust proofing it'll stay as it is!

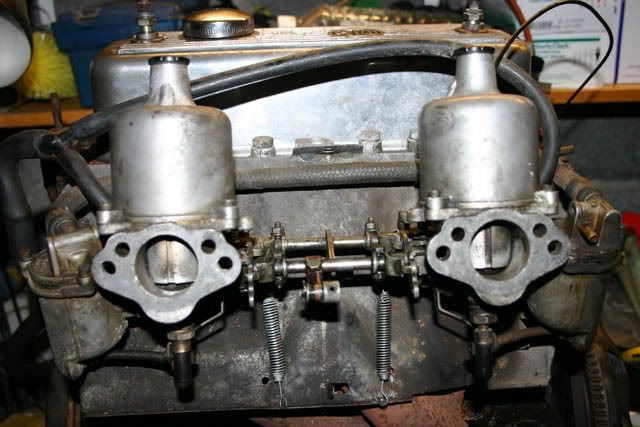
Here are the pictures of today's work:


As you can see there's not a lot left in the engine bay, just a few bits to undo and remove. The carbs and manifolds are staying on the engine for now.


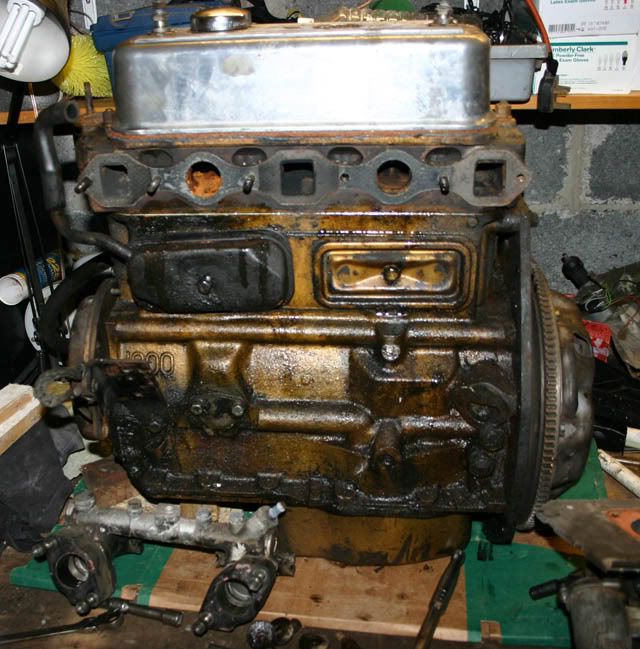
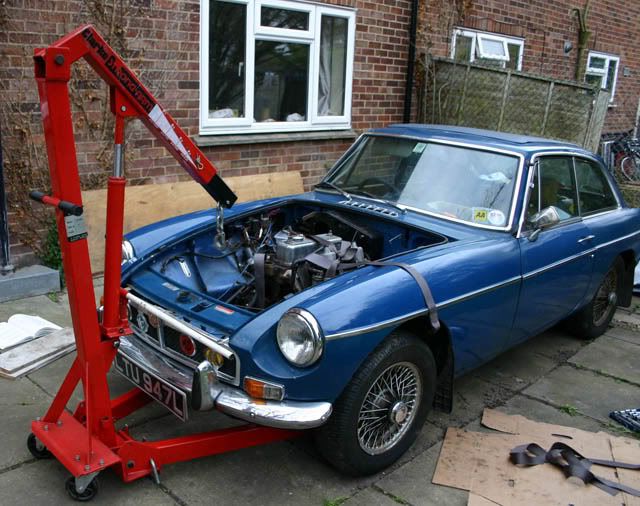
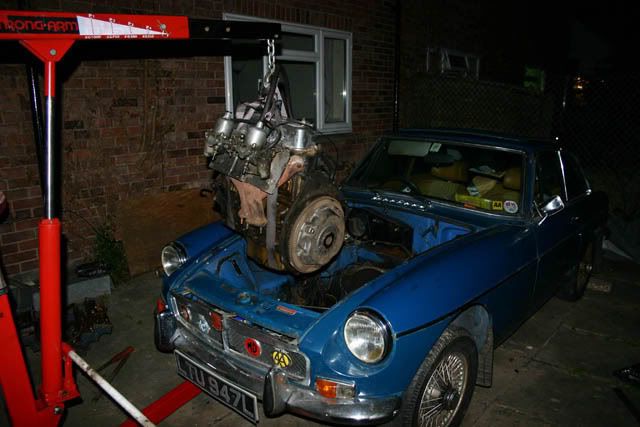
With everything undone and the gearbox supported with a trolley jack the engine crane (bought for £40 a couple of years ago because it needed new seals) was positioned and slings tied round the engine.


The engine came out a treat - the last one I helped remove was a Jaguar V-12 and I'm pleased to report that there was LOT more room in the MGB's engine bay!


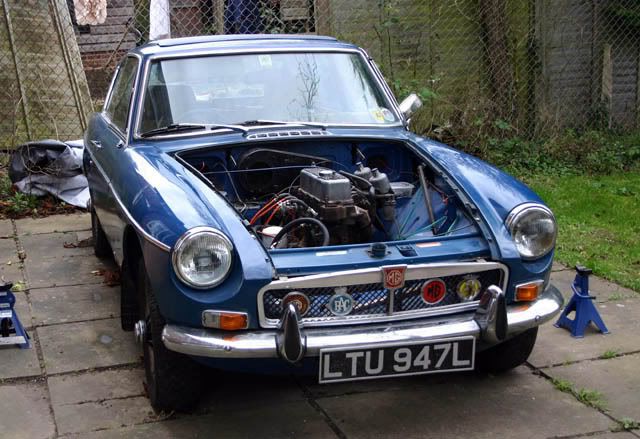
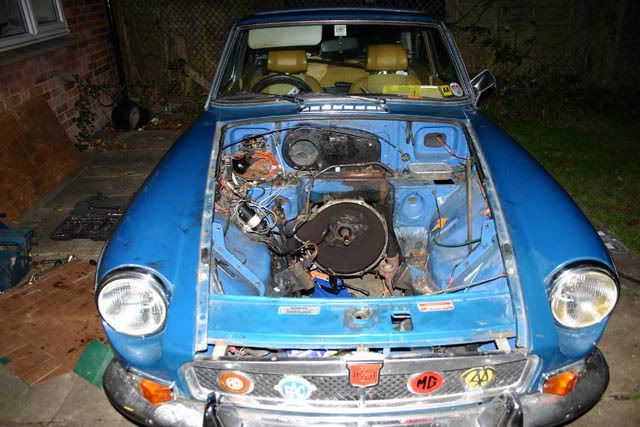
The car as it is now - not a lot left in that engine bay!

The work can now continue in two fronts: reconditioning of the engine and stripping the engine bay out so that it can be repainted. I may also wipe the oily paw prints off the bodywork...

A gallery of today's photographs is here.