

I nipped back to see Paul (the bloke who sold me the door on eBay) at the weekend to pick up a water pump and a pair of front sidelight/indicator clusters.
He very kindly removed the pulley from the old pump for me and refitted it onto the new one which saved me a job.
There's not a huge amount to buy now, I think it's ony a thermostat and bolts to replace the three retaining studs on the cylinderhead. Oh - and a replacement gasket for the exhaust.
Subscribe To
Monday, 8 November 2010
Sunday, 31 October 2010
First bits of spraying done...
The MG is now safely hidden around the back of the house for the winter and I've also just got back all the bits of engine-bay metal work that have been blasted and painted.
They look amazing compared with how they loooked last time I saw them!!
They look amazing compared with how they loooked last time I saw them!!

I've got replacement Lucas labels for the air filter boxes (and another pair of unmolested boxes to show me where the labels go!) but other than that, these parts are ready to go back in.
The last job I need to do before winter sets in proper is to remove the engine, so it can be cleaned, repaired and re-painted over the winter.
I'll post back when I do this in the next month or so...
Wednesday, 15 September 2010
Temperature sender blues and progress report
The last month has seen a bit of a slow-down with work on the MG. The metal bits from the engine bay are nearly all blasted, primed and painted but I've decided to leave the Hammerite in the engine bay over the winter and tackle it in the spring. Don't want to expose metal to the winter elements if I can avoid it!
I've also bought new covers for all my cars, the MG included. It now has a water-proof, fleece-lined coat to help it over-winter because unfortunately the XJ-S get the garage!!
I had a bit of bad luck with the temperature sender bulb that was stuck in the cylinderhead. I've been dousing it with penetrating oil over the past couple of months in the hope of getting it out. However, nothing I did seemed to help it work loose. I also tried heat /ice and then finally pressing it out of the head with a home-made device consisting of a large washer and a couple of nuts and bolts. Sadly this last method was a bit of a 'kill or cure' measure and it ended up splitting. Still, short of a miracle I reckon it was never going to shift without damage so at least it's one last thing standing in the say of progress.
Only the exhaust down-pipe bolts and gearbox->adaptor plate bolts to undo and the engine'll be out. The plan is to hoik the engine out and work on it during the winter and then work on reassembly can begin in the spring.
I may well spend a little time investigating the wiring this autumn so that I can fit a battery and fire the engine up when it's back in, without any fear of short-circuits and fires!!
Saturday, 14 August 2010
Coreplug issue solved...
Well, thanks to my friends at MG Experience I've found out all I need to know about MGB core plugs.
Turns out that there is one at the back of the engine block, but it sits behind the gearbox adaptor plate. There's a hole in the adaptor plate but it's not big enough for the coreplug to pass through. There are 4 core plugs in total - three along the non-manifold side of the block and one at the back of the block and all are the same size. To replace the rear core plug you have to split engine and 'box.
It's good to settle that little question and work will now continue to remove the engine from the car...
Wednesday, 11 August 2010
I almost forgot - More About Core Plugs
I almost forgot - this is a bit of plot thickening!
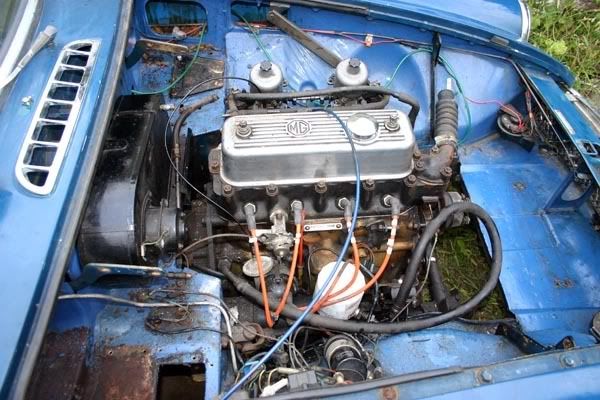
I went to the BL/BMC car rally in Peterborough on the 1st August and found a really tidy little '72 MGBGT. The owner was a friendly sort and didn't mind me poking around in the engine bay and taking some photos. By far the biggest news is that his car has a hole at the back of the engine, same as mine but obviously his isn't leaking water, so I'm not sure if there should be a coreplug there or not. If not (as seems the case) then where can the water leak have been coming from? Head gasket? Or was it in fact the main radiator hose which was split when I removed it...?
Not sure but the engine's coming out now so it can be painted along with the engine bay and I'll take some advice when I can get at it properly...
New Parts but not a lot of work.
A general lack of disposable funds and family commitments have meant that not a huge amount has happened in the last couple of weeks. There are some good bits of news though.
The metal parts are away being blasted so they'll hopefully be back soon, ready to be painted.
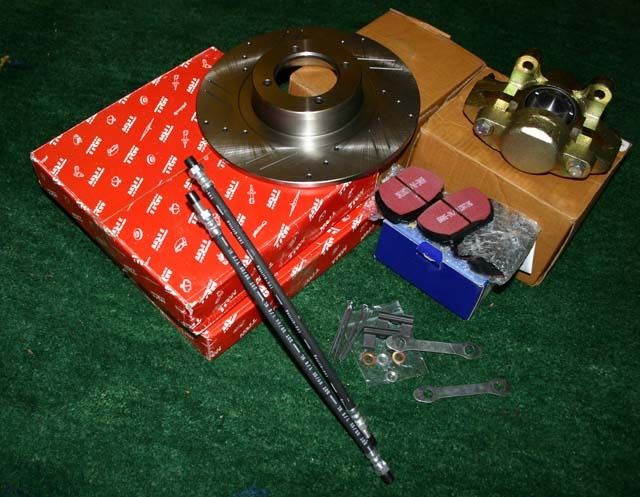
In the meantime I've been dismantlling the front braking components. I'd planned to refurbish the callipers and replace all the perishables but unfortunately even though I'd soaked it in penetrating oil I managed to snap off one of the calliper bleed nipples. An Easy-Out utterly failed to get it out so it began to look like a replacement was the only sensible option. Once I'd compared prices of pads, discs, calipers etc, a deal on eBay at £140 seemed the best value for money, so I bought this little lot:

I've also got a replacement alloy thermostat housing from eBay.
In other big news, I won a driver's door, too. An absolute bargain at £40 especially since it was only 15 miles away. The seller turned out to be a really nice bloke who had previously restored 2 MGBs and he has a whole load of misc spares and I've ordered the following from him:
1x Water Pump
2x Front indicator & Sidelight assemblies
2x Reverse lamp lenses
I'll be picking those parts up shortly.
So actually not too shabby in the progress stakes; I'm going to spend some time getting the last bits off for the engine to come out.
The metal parts are away being blasted so they'll hopefully be back soon, ready to be painted.
In the meantime I've been dismantlling the front braking components. I'd planned to refurbish the callipers and replace all the perishables but unfortunately even though I'd soaked it in penetrating oil I managed to snap off one of the calliper bleed nipples. An Easy-Out utterly failed to get it out so it began to look like a replacement was the only sensible option. Once I'd compared prices of pads, discs, calipers etc, a deal on eBay at £140 seemed the best value for money, so I bought this little lot:
I've also got a replacement alloy thermostat housing from eBay.
In other big news, I won a driver's door, too. An absolute bargain at £40 especially since it was only 15 miles away. The seller turned out to be a really nice bloke who had previously restored 2 MGBs and he has a whole load of misc spares and I've ordered the following from him:
1x Water Pump
2x Front indicator & Sidelight assemblies
2x Reverse lamp lenses
I'll be picking those parts up shortly.
So actually not too shabby in the progress stakes; I'm going to spend some time getting the last bits off for the engine to come out.
Sunday, 11 July 2010
Classic Metal of a Different Kind...
Didn't take the cover off the MG today - spent the day in the company of some very classic metal instead!
Enjoy the photos... And the Videos!
Enjoy the photos... And the Videos!
Saturday, 10 July 2010
Stripping the engine bay metal items
I spent the day stripping the metal items from the engine bay with Nitromors and elbow grease. Cat's father has a sand blasting cabinet and has kindly offered to tidy them up for me but the caked-on Hammerite was best stripped off before hand.
The items went from this:

To this:

Hmm it doesn't look all that different but what you see there is about 4 hours work! They'll be great when they've been blasted and painted.
I also prepared the brake calipers for painting but then managed to shear off one of the bleed nipples so I may just jack it in and buy a pair of new calipers.
One other thing I nearly achieved today was the removal of the heater from the engine bay. I followed Mr. Haynes's instructions and found that it was stuck in with some kind of adhesive but even after I broke the seal, there's something else holding it in so I'll return to that next week.
The final thing I did was re-fit the rebuilt clutch slave cylinder with a new split pin.
More pictures here.
The items went from this:
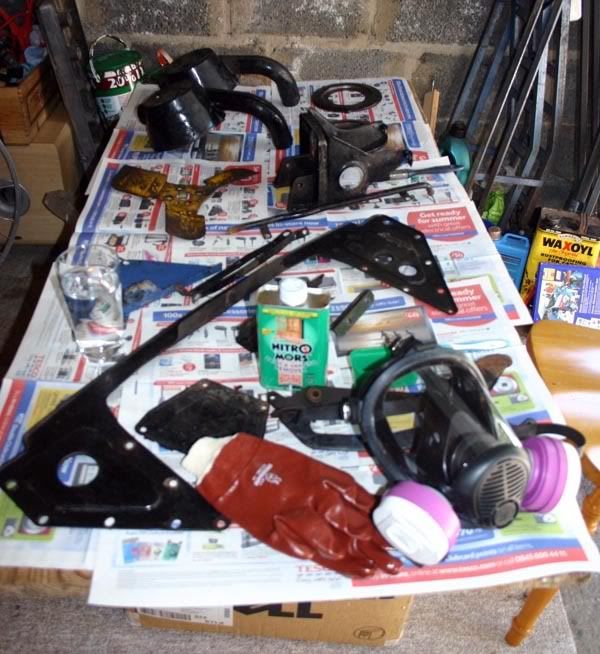
To this:

Hmm it doesn't look all that different but what you see there is about 4 hours work! They'll be great when they've been blasted and painted.
I also prepared the brake calipers for painting but then managed to shear off one of the bleed nipples so I may just jack it in and buy a pair of new calipers.
One other thing I nearly achieved today was the removal of the heater from the engine bay. I followed Mr. Haynes's instructions and found that it was stuck in with some kind of adhesive but even after I broke the seal, there's something else holding it in so I'll return to that next week.
The final thing I did was re-fit the rebuilt clutch slave cylinder with a new split pin.
More pictures here.
Friday, 9 July 2010
A better evening.
Came home from work today and made some progress - makes up for the previous post I suppose.
Firstly I used a blow-torch some MoleGrips and a screwdriver to remove the broken parts of the thermostat housing and then tried unsuccessfully to remove the temperature sender. I'll get it eventually!
I also removed both brake calipers and the good news is that they appear to be perfectly serviceable as are the discs and pads.
Finally Cat and I rebuilt the brake master cylinder. That's nearly a complete set of working hydraulics now.
Sorry for the lack of photos - I'll take some tomorrow.
Thursday, 8 July 2010
Not such a good evening's work..
Having asked the friendly people on the MG Experience forum how to get the temperature sender out of the cylinderhead, it turns out that you can get to it through the hole for the thermostat in the cylinderhead. Great - easy - just remove the thermostat housing and prise it out thinks I.
Hmm - got home yesterday, undid the three nuts that hold the thermostat housing on and gently tried to lift the cast iron thermostat housing off. Wouldn't budge. Tried gently levering it, cutting the gasket with a knife, prising it with a screwdriver - nothing. I then made a mistake, as it happens - I gave it a very gentle tap with a hammer and the damn thing spit into three parts, each one very much attached to the stud which was holding it in place.
So a new thermostat housing goes on the list and I've got to get the broken parts free without breaking off a stud in the cylinderhead.
On the positive side, I paid a visit to my mate who sold me the car and he had found a few more goodies in his garage, including polybushes for the rear of the car, some new sparkplugs and a spare speedo.
So it's not all bad :-) Anyway, I'm not going to be working on the car tonight as I'm off to the pub instead.
Tuesday, 6 July 2010
Working Clutch Hydraulics
Tonight Cat and I moved the MG onto the drive where I could jack it up and get under it for the first time.
It looks pretty good under there - nice underseal and not much rust at all, which is nice.
Anyway this evening's work was to dismantle a bit more of the engine bay and also replace the seals on the clutch hydraulics.
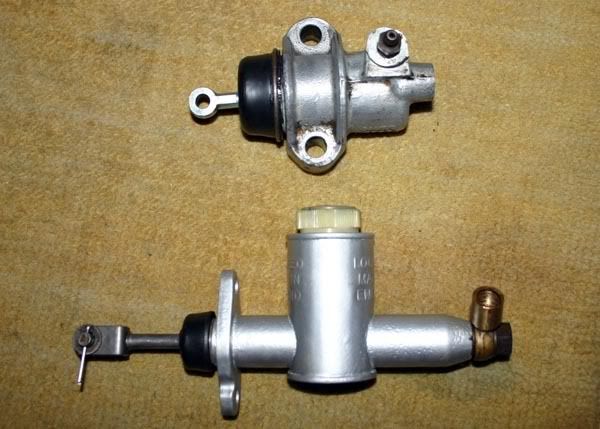
Here are both cylinders rebuilt and ready to go:

I also took a look at the front brakes - new pads and flexi-hoses will be the order of the day so these go on the list!
I've also discovered the MG Experience website today. Home to a very friendly group of enthusiasts with a very helpful forum indeed.
It looks pretty good under there - nice underseal and not much rust at all, which is nice.
Anyway this evening's work was to dismantle a bit more of the engine bay and also replace the seals on the clutch hydraulics.
Here are both cylinders rebuilt and ready to go:
I also took a look at the front brakes - new pads and flexi-hoses will be the order of the day so these go on the list!
I've also discovered the MG Experience website today. Home to a very friendly group of enthusiasts with a very helpful forum indeed.
Sunday, 4 July 2010
Dismantling the Engine Bay...
I nearly finished work on the Maestro yesterday, so to celebrate this acheivement I decided to attack the engine bay of the MG. While I did that, my girlfriend (thenceforth referred to as Cat) got a 'Magic Sponge' and began to clean the interior.
Rather pleasingly, almost everything yielded to the socket and it didn't take long to get it from this:

To this:

The only bad thing to report is that there is evidence of bodgery in the engine bay: the brush-painted panels (in the wrong colour), a brake servo held on with only one of the three bolts, assorted and wrong sized bolts here and there, other repainted items that haven't been stripped before being painted the wrong colour and evidence of items being painted without first having been removed.... I guess this is to be expected with an old car that's had quite a few owners over the years though! Never fear as this will all be put right as it gets reassembled and this will be greatly assisted by a bag of nuts, bolts and fixings that Simon handed over to me with the car.
Oh - there is one other thing to report: Mr ratty had indeed been at work, chewing through a few wires in the engine bay so I guess we'll wait and see what he's done to the dash wiring as well!
More pictures here.
Rather pleasingly, almost everything yielded to the socket and it didn't take long to get it from this:
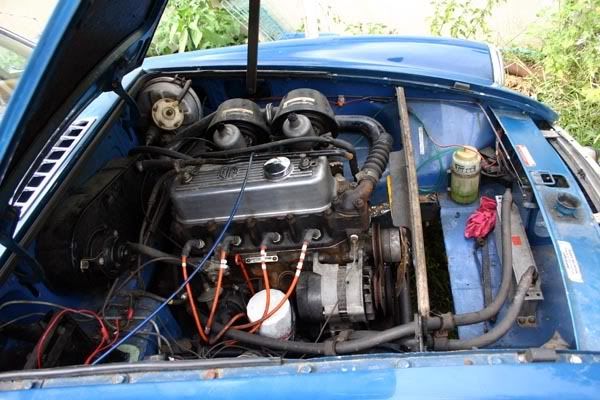
To this:
The only bad thing to report is that there is evidence of bodgery in the engine bay: the brush-painted panels (in the wrong colour), a brake servo held on with only one of the three bolts, assorted and wrong sized bolts here and there, other repainted items that haven't been stripped before being painted the wrong colour and evidence of items being painted without first having been removed.... I guess this is to be expected with an old car that's had quite a few owners over the years though! Never fear as this will all be put right as it gets reassembled and this will be greatly assisted by a bag of nuts, bolts and fixings that Simon handed over to me with the car.
Oh - there is one other thing to report: Mr ratty had indeed been at work, chewing through a few wires in the engine bay so I guess we'll wait and see what he's done to the dash wiring as well!
More pictures here.
Saturday, 3 July 2010
Cooling System Investigations
Encouraged by my success with the master cylinders today, I had some spare time and decided to investigate the condition of the cooling system.
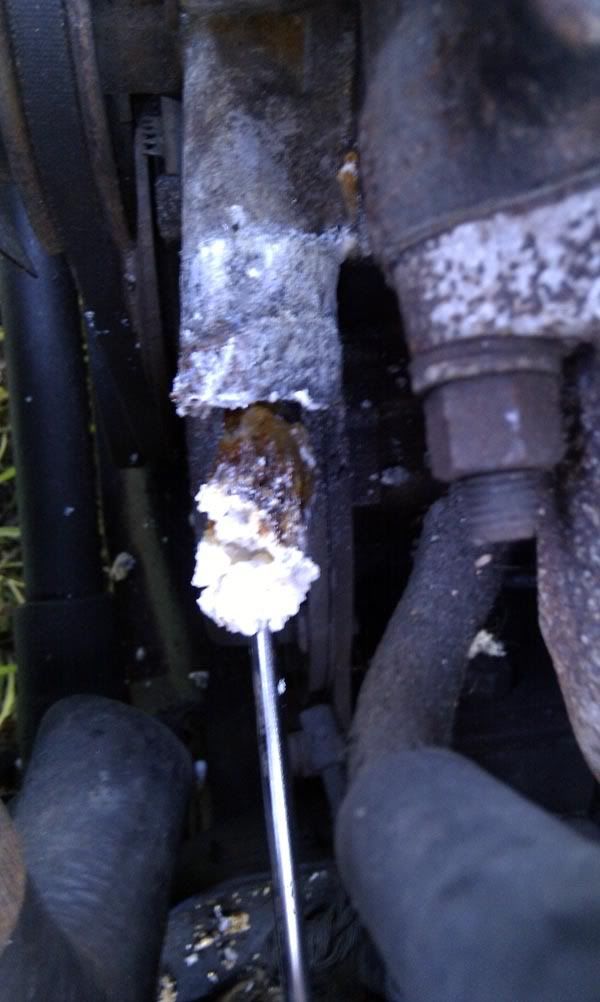
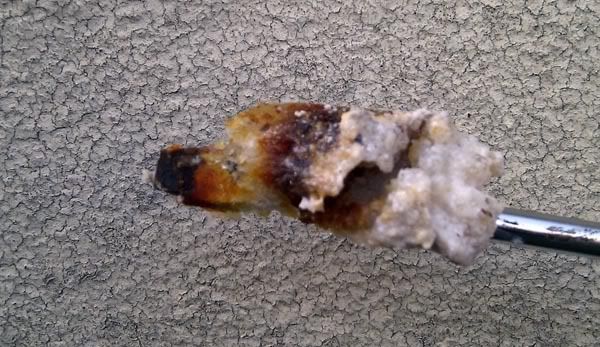
I wasn't expecting too much good news as the failed core plug was found to be completely missing at the back of the engine block and also there was a large split in the bottom radiator hose.
The radiator was fairly easy to remove but when the hose was removed from the water pump, I found lots of nasty gunk in the pump's input hose:


So a new water pump and hose set go on the shopping list...
Also it's been bugging me a little that the engine bay has been painted the wrong colour, not just that but it's also been painted with a brush rather than sprayed so the finish is a little variable. When I took the master cylinders out this afternoon I also noticed that the area beneath them was rusty and in need of attention. Looking that the engine bay I've realised that once the engine's out, there's not much more work required to clear the engine bay of components so that it can be rubbed-down and re-finished.
Looks like this will be added to the list of jobs to do!
I wasn't expecting too much good news as the failed core plug was found to be completely missing at the back of the engine block and also there was a large split in the bottom radiator hose.
The radiator was fairly easy to remove but when the hose was removed from the water pump, I found lots of nasty gunk in the pump's input hose:
So a new water pump and hose set go on the shopping list...
Also it's been bugging me a little that the engine bay has been painted the wrong colour, not just that but it's also been painted with a brush rather than sprayed so the finish is a little variable. When I took the master cylinders out this afternoon I also noticed that the area beneath them was rusty and in need of attention. Looking that the engine bay I've realised that once the engine's out, there's not much more work required to clear the engine bay of components so that it can be rubbed-down and re-finished.
Looks like this will be added to the list of jobs to do!
Master Cylinder Overhauls
Having had a bit of a session on eBay yesterday, and with a clutch master cylinder kit arriving this morning, I decided to get the spanners out and remove the clutch and brake master cylinders.
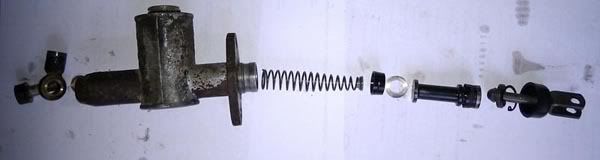
Removing the clutch m/c is a bit of a fiddly job - the pipe union came apart easily and the two bolts came undone OK (would it have killed MG to use captive nuts or bolts to attach these parts?!) but actually getting the unit out proved more difficult. In the end, I had to remove the circlip and withdraw the plunger to get it out albeit in two parts.
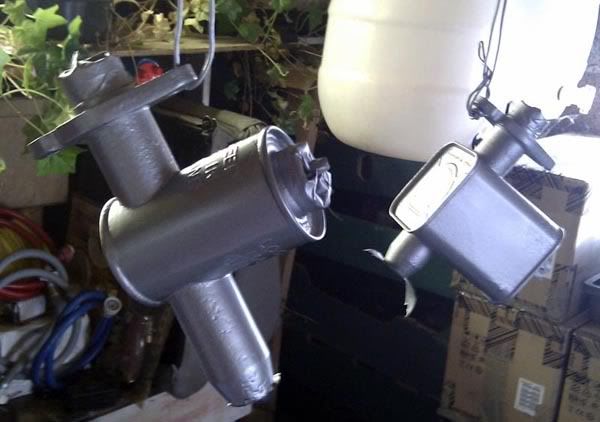
The brake m/c was a lot easier!Anyway, both items were dismantled, cleaned out with meths and prepped for painting. The seal kit that I'd bought turned out to the the wrong one (it only cost £3.25 on eBay!) so another one has been ordered. Here's the clutch master cylinder:

I've painted both items ready for re-fitting and will do so as soon as the seal kits arrive - here they are hanging up in my garage:

More pictures here.
Removing the clutch m/c is a bit of a fiddly job - the pipe union came apart easily and the two bolts came undone OK (would it have killed MG to use captive nuts or bolts to attach these parts?!) but actually getting the unit out proved more difficult. In the end, I had to remove the circlip and withdraw the plunger to get it out albeit in two parts.
The brake m/c was a lot easier!Anyway, both items were dismantled, cleaned out with meths and prepped for painting. The seal kit that I'd bought turned out to the the wrong one (it only cost £3.25 on eBay!) so another one has been ordered. Here's the clutch master cylinder:
I've painted both items ready for re-fitting and will do so as soon as the seal kits arrive - here they are hanging up in my garage:
More pictures here.
Monday, 28 June 2010
Stuff I need to Buy
I'm keeping a list here of items that I've bought (as well as a running total of outlay) and below it the items that I still need to source. These lists will gradually grow over time!
Things already bought:
Things already bought:
| Item Bought | Cost |
| Car & Spares | £400.00 |
| Core Plugs | £5.00 |
| Clutch Kit | £51.00 |
| Accellerator Cable | £3.85 |
| Brake Master Cylinder Seal Kit | £5.95 |
| Clutch Slave Cylinder Seal Kit | £3.25 |
| Clutch Slave Cylinder Seal Kit | £7.00 |
| Clutch Flexi Hose | £6.25 |
| Hose Kit | £29.53 |
| Water Pump, Various Lamp lenses | £25.00 |
| 2x Oil Cooler Rubber Gromits | £1.80 |
| Thermostat Housing | £10.52 |
| Driver's Door | £40.00 |
| Brake Flexible Hoses | £9.41 |
| Unipart labels for Airfilters | £2.00 |
| Brake Calipers, discs, pads, fixing kit, hoses | £140.75 |
| Top Heater Pipe, Thermostat studs & Exhaust rings | £17.00 |
| SU Carb rebuild kit | £8.49 |
| Misc Spares on eBay | £15.29 |
| Thermostat | £8.65 |
| 2x Rear Wheel Cylinder | £17.03 |
| Plug leads | £11.04 |
| Head Gasket Set | £13.02 |
| Bottom Engine Gasket Set | £12.02 |
| Rear Crank shaft Seal | £4.95 |
| Locktabs for Flywheel, Rear Oil Seal & Pulley | £8.00 |
| Gold Paint for Engine | £12.90 |
| Clutch Alignment Tool | £7.49 |
| Oversize Pistons | £37.00 |
| Temperature Gauge | £41.01 |
| Cylinderhead Diagnostic Work | £31.01 |
| Ring Gear Replacement | £71.74 |
| Replacement Cylinderhead | £330.00 |
| Block Rebore | £72.00 |
| Cylinder Block Reface | £48.00 |
| Strip / clean / parts | £60.00 |
| Piston Rings | £88.80 |
| Timing Gear | £42.90 |
| Clutch Pivot Bolt + Bush | £5.65 |
| Nitromors | £23.40 |
| Red Oxide Primer | £41.52 |
| Heater Parts & Teal Blue Paint (MGOC) | £42.35 |
| Carb Heatshield | £39.25 |
| Misc Engine Bay Fittings (MGOC) | £16.53 |
| Total | £1,868.35 |
Things still to source:
Possibly fuel tank
Non-Essential Items to buy:
- Seat cover / refurbishment
- Door Cards repair / refurbish
Sunday, 27 June 2010
Good news - she turns over!
There's not a great deal to report this weekend but there are a few bits of good news. Firstly, I've been able to get on with the Maestro restoratoin that I'm in the middle of - I removed the front panels and Waxoyled pretty much everywhere. I also finished re-building the front suspension which is the culmination of quite a lot of work. Not long until it's finished and the MG work begins in ernest.
On the MG front, I've been reading quite a lot of the documentation and manuals that came with the car. Rather usefully there are instructions for engine removal, dash removal, clutch hydraulic system servicing and fuel tank fault finding. They've also given me a few more jobs to add to the list below - service the gearbox and overdrive while they're out of the car. I'm also going to replace all the core plugs in the engine - the accepted wisdom seems to be that if one's gone then the others are on their way and you might as well replace them while the engine's out.
I only actually did three things to the MG this weekend - 1) gave it a wash and polish, 2) while the plugs were out I gave the front drivebelt a bit of a tweak and the engine turned nice and freely and finally 3) investigated the clutch master cylinder.
The documents I was reading warned of a nearly-impossible-to-remove screw holding the brake/clutch master cylinder cover on. Luckily someone has been there before me and when they refitted the cover they left the screw off. Lucky. Anyway I can see how it all comes apart so servicing the master / slave cylinder might be the first proper job that I do.
While the engine / box are out I'll also replace the clutch.
Tuesday, 22 June 2010
Oiling the bores and making the inside acceptable
I came home from work yesterday evening and wanted to take a look at the MG -just to inspect my investment you understand!!
I decided that it couldn't hurt to get the spark plugs out and squirt a little 10w40 into the cylinders - I've not tried to turn the engine over yet so a bit of lubrication in the bores is a good thing before I do.
Having done that I turned my attention to the interior. It's had a set of seat covers on it since the '90s and these had started to decompose. There was also quite a variety of over-mats in the car, as well as two rubber MG mats in the front and also quite an assembled mass of dust, rubbish, debris, decomposed foam etc all over the floor. After removing all of this, a thorough Dysoning brought the floors and seats back to an acceptable standard.
The seats will need further attention - the original covers are a little tatty, faded, stained and loose-fitting but they're fine for now. I'm actually in favour of replacing the lot with a black leather interior but my girlfriend likes the ochre colour so we may compromise on oatmeal leather instead.
I've just got to finish rebuilding my Maestro and work on the MG can start in earnest.
Monday, 21 June 2010
List of known faults and work required.
Here's a list of the stuff that I know needs to be achieved before the car will pass an MoT - I've categorised these as far as possible and added a list of non-essential items below it as well.
Repair Known Engine Fault:
Repair Known Engine Fault:
- Take engine out
- Replace all Engine Core Plugs
- Replace clutch
- Put engine back in
- Remove spark plugs, pour oil into the bores and allow to soak
- Change oil
- Replace Waer Pump
- Replace All Coolant Hoses
- Fill Coolant
- Replace gearbox oil
- Service overdrive unit
- Replace Clutch slave/master seals & flexible pipe
- Replace brake fluid
- Overhaul brake calipers & replace seals
- Inspect brake pads / discs
- Inspect rear brakes
- Inspect brake lines / flexihoses
- Inspect / replace drivebelt
- Grease suspension grease points
- Check lighting/ switchgear works
- Find key for locking petrol filler cap
- Check operation of seatbelts
- Replace Tyres
- Re-grease wheel bearings
- Trace source of fuel smell (possibly tank but fuel pipe under car also looks suspect)
- Investigate wiring behind dash and in left side of engine bay to check for rat damage
- Clean inside / outside
- Remove '80s cassette player and broken loudspeakers
- Replace driver's door.
- While engine's out, strip / paint engine bay
- While engine's out, strip / paint engine
Getting the MG Home.
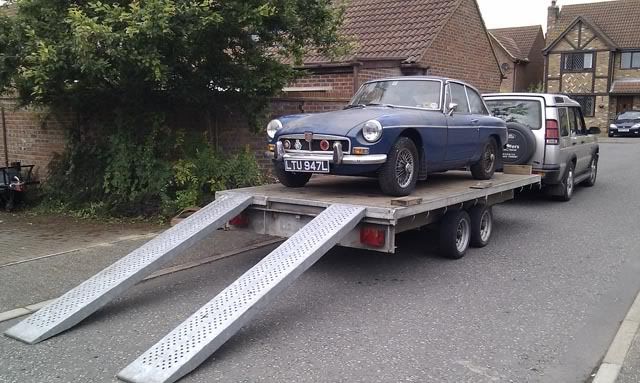
The date of Saturday 19th was agreed for transfer of the MG from Huntingdon to Cambridge. We enlisted the help of family members who had a trailer and Landrover and rendezvoused at Simon's house.
The V5 was duly signed and a huge boxfile of paperwork handed over which included quite a lot of service history, previous MoTs and a genuine BL workshop manual. The car also came with a spare SS exhaust, four wire wheels and a box of misc parts.
Loading it onto the trailer passed without hitch (haha) and we were soon on our way back to Cambridge.

More pictures are Here.
The V5 was duly signed and a huge boxfile of paperwork handed over which included quite a lot of service history, previous MoTs and a genuine BL workshop manual. The car also came with a spare SS exhaust, four wire wheels and a box of misc parts.
Loading it onto the trailer passed without hitch (haha) and we were soon on our way back to Cambridge.
More pictures are Here.
Intro and First Pictures...
This all came about when a friend (also called Simon) offered me the car that had been in his garage since some time in 1998. He'd heard that I was on the lookout for a restoration project and this could be just the ticket.
The story goes that a lot of work had been done to the car, including new sills, a suspension rebuild and stage-one engine, but on its first trip out after all the work it blew a core plug at the back of the engine. It was driven a short distance home and pushed into the garage but the enthusiasm to remove the engine and repair the fault was never found.
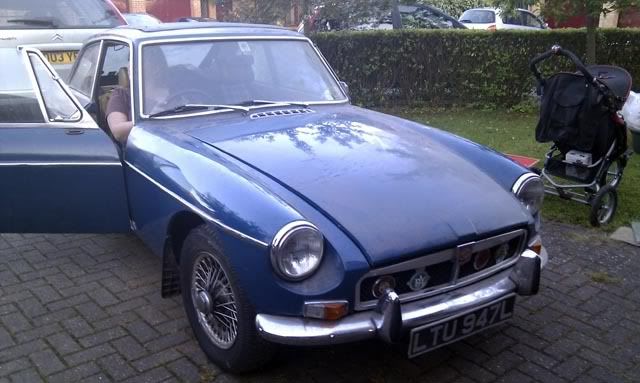
When we met up to strike a deal, Simon had removed most of the things that had been stored around it in his garage and although it was dusty, it looked to be in relatively good order - certainly better than I had expected.

More pictures here.
The handbrake had been left off and it moved freely enough to get out of the garage. The bodywork is in pretty tidy shape with signs of previous repairs, particularly in the bottom half of the car but favourite MGB rot points are generally fairly solid, this is probably thanks to the thorough waxoyling it had received sometime in the past. The only exception seems to be the tops of the rear wings (which appear to have been bodged and will need investigation in the future) and the bottom of the driver's door frame is also pretty shot with rust. The paint job is a bit variable but will serve for now.
Other than the known engine fault with the cooling system, the mechanicals appeared to be very tidy indeed. The suspension components are a little crusty from storage but evidently work has been done and these will probably only need attention for cosmetic reasons; it was also nice to see that the front has Polybushes fitted too.
Other known faults included a fuel leak, due to a suspected rusty fuel tank and also the fact that a rat had made itself at home in the engine bay necessitating a thorough check of the wiring both under the bonnet and behind the dash.
With all this information at hand, a deal was stuck and preparations made to collect the car as soon as possible.
The story goes that a lot of work had been done to the car, including new sills, a suspension rebuild and stage-one engine, but on its first trip out after all the work it blew a core plug at the back of the engine. It was driven a short distance home and pushed into the garage but the enthusiasm to remove the engine and repair the fault was never found.
When we met up to strike a deal, Simon had removed most of the things that had been stored around it in his garage and although it was dusty, it looked to be in relatively good order - certainly better than I had expected.
More pictures here.
The handbrake had been left off and it moved freely enough to get out of the garage. The bodywork is in pretty tidy shape with signs of previous repairs, particularly in the bottom half of the car but favourite MGB rot points are generally fairly solid, this is probably thanks to the thorough waxoyling it had received sometime in the past. The only exception seems to be the tops of the rear wings (which appear to have been bodged and will need investigation in the future) and the bottom of the driver's door frame is also pretty shot with rust. The paint job is a bit variable but will serve for now.
Other than the known engine fault with the cooling system, the mechanicals appeared to be very tidy indeed. The suspension components are a little crusty from storage but evidently work has been done and these will probably only need attention for cosmetic reasons; it was also nice to see that the front has Polybushes fitted too.
Other known faults included a fuel leak, due to a suspected rusty fuel tank and also the fact that a rat had made itself at home in the engine bay necessitating a thorough check of the wiring both under the bonnet and behind the dash.
With all this information at hand, a deal was stuck and preparations made to collect the car as soon as possible.
Subscribe to:
Comments (Atom)