

Didn't take the cover off the MG today - spent the day in the company of some very classic metal instead!
Enjoy the photos... And the Videos!
Subscribe To
Sunday, 11 July 2010
Saturday, 10 July 2010
Stripping the engine bay metal items
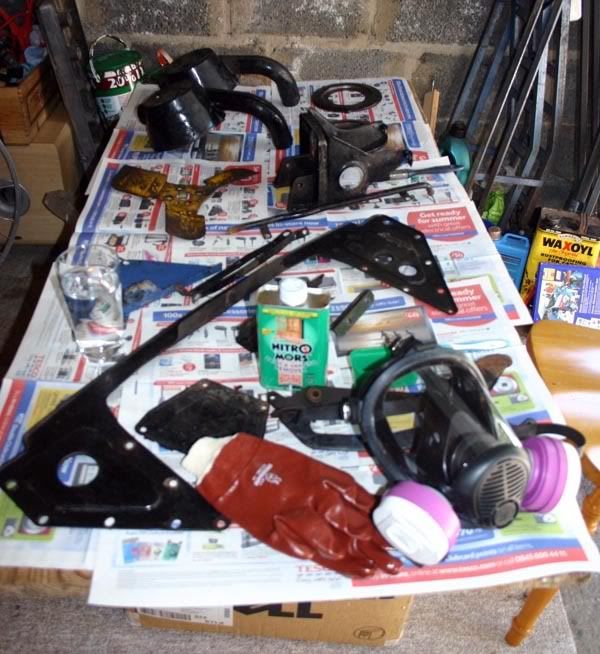
I spent the day stripping the metal items from the engine bay with Nitromors and elbow grease. Cat's father has a sand blasting cabinet and has kindly offered to tidy them up for me but the caked-on Hammerite was best stripped off before hand.
The items went from this:

To this:

Hmm it doesn't look all that different but what you see there is about 4 hours work! They'll be great when they've been blasted and painted.
I also prepared the brake calipers for painting but then managed to shear off one of the bleed nipples so I may just jack it in and buy a pair of new calipers.
One other thing I nearly achieved today was the removal of the heater from the engine bay. I followed Mr. Haynes's instructions and found that it was stuck in with some kind of adhesive but even after I broke the seal, there's something else holding it in so I'll return to that next week.
The final thing I did was re-fit the rebuilt clutch slave cylinder with a new split pin.
More pictures here.
The items went from this:
To this:

Hmm it doesn't look all that different but what you see there is about 4 hours work! They'll be great when they've been blasted and painted.
I also prepared the brake calipers for painting but then managed to shear off one of the bleed nipples so I may just jack it in and buy a pair of new calipers.
One other thing I nearly achieved today was the removal of the heater from the engine bay. I followed Mr. Haynes's instructions and found that it was stuck in with some kind of adhesive but even after I broke the seal, there's something else holding it in so I'll return to that next week.
The final thing I did was re-fit the rebuilt clutch slave cylinder with a new split pin.
More pictures here.
Friday, 9 July 2010
A better evening.
Came home from work today and made some progress - makes up for the previous post I suppose.
Firstly I used a blow-torch some MoleGrips and a screwdriver to remove the broken parts of the thermostat housing and then tried unsuccessfully to remove the temperature sender. I'll get it eventually!
I also removed both brake calipers and the good news is that they appear to be perfectly serviceable as are the discs and pads.
Finally Cat and I rebuilt the brake master cylinder. That's nearly a complete set of working hydraulics now.
Sorry for the lack of photos - I'll take some tomorrow.
Thursday, 8 July 2010
Not such a good evening's work..
Having asked the friendly people on the MG Experience forum how to get the temperature sender out of the cylinderhead, it turns out that you can get to it through the hole for the thermostat in the cylinderhead. Great - easy - just remove the thermostat housing and prise it out thinks I.
Hmm - got home yesterday, undid the three nuts that hold the thermostat housing on and gently tried to lift the cast iron thermostat housing off. Wouldn't budge. Tried gently levering it, cutting the gasket with a knife, prising it with a screwdriver - nothing. I then made a mistake, as it happens - I gave it a very gentle tap with a hammer and the damn thing spit into three parts, each one very much attached to the stud which was holding it in place.
So a new thermostat housing goes on the list and I've got to get the broken parts free without breaking off a stud in the cylinderhead.
On the positive side, I paid a visit to my mate who sold me the car and he had found a few more goodies in his garage, including polybushes for the rear of the car, some new sparkplugs and a spare speedo.
So it's not all bad :-) Anyway, I'm not going to be working on the car tonight as I'm off to the pub instead.
Tuesday, 6 July 2010
Working Clutch Hydraulics
Tonight Cat and I moved the MG onto the drive where I could jack it up and get under it for the first time.
It looks pretty good under there - nice underseal and not much rust at all, which is nice.
Anyway this evening's work was to dismantle a bit more of the engine bay and also replace the seals on the clutch hydraulics.
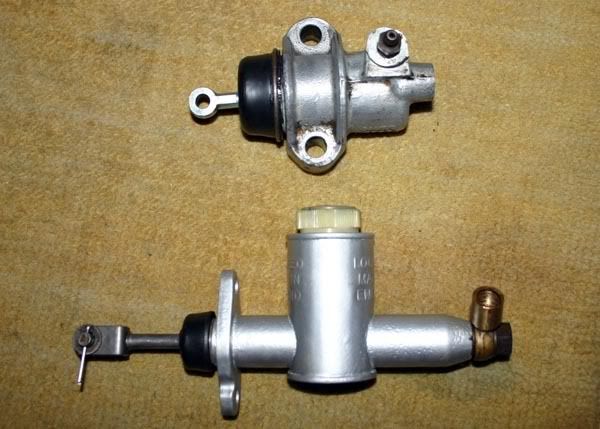
Here are both cylinders rebuilt and ready to go:

I also took a look at the front brakes - new pads and flexi-hoses will be the order of the day so these go on the list!
I've also discovered the MG Experience website today. Home to a very friendly group of enthusiasts with a very helpful forum indeed.
It looks pretty good under there - nice underseal and not much rust at all, which is nice.
Anyway this evening's work was to dismantle a bit more of the engine bay and also replace the seals on the clutch hydraulics.
Here are both cylinders rebuilt and ready to go:
I also took a look at the front brakes - new pads and flexi-hoses will be the order of the day so these go on the list!
I've also discovered the MG Experience website today. Home to a very friendly group of enthusiasts with a very helpful forum indeed.
Sunday, 4 July 2010
Dismantling the Engine Bay...
I nearly finished work on the Maestro yesterday, so to celebrate this acheivement I decided to attack the engine bay of the MG. While I did that, my girlfriend (thenceforth referred to as Cat) got a 'Magic Sponge' and began to clean the interior.
Rather pleasingly, almost everything yielded to the socket and it didn't take long to get it from this:

To this:

The only bad thing to report is that there is evidence of bodgery in the engine bay: the brush-painted panels (in the wrong colour), a brake servo held on with only one of the three bolts, assorted and wrong sized bolts here and there, other repainted items that haven't been stripped before being painted the wrong colour and evidence of items being painted without first having been removed.... I guess this is to be expected with an old car that's had quite a few owners over the years though! Never fear as this will all be put right as it gets reassembled and this will be greatly assisted by a bag of nuts, bolts and fixings that Simon handed over to me with the car.
Oh - there is one other thing to report: Mr ratty had indeed been at work, chewing through a few wires in the engine bay so I guess we'll wait and see what he's done to the dash wiring as well!
More pictures here.
Rather pleasingly, almost everything yielded to the socket and it didn't take long to get it from this:
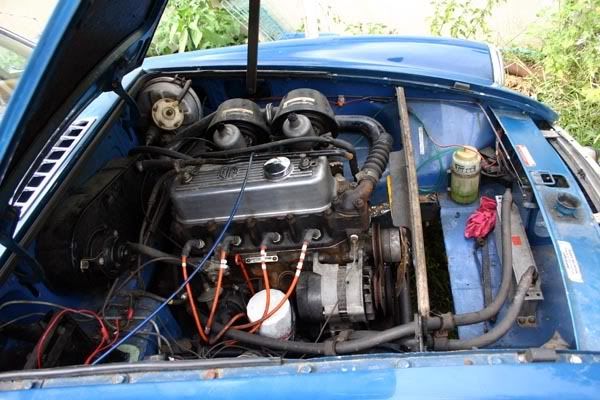
To this:
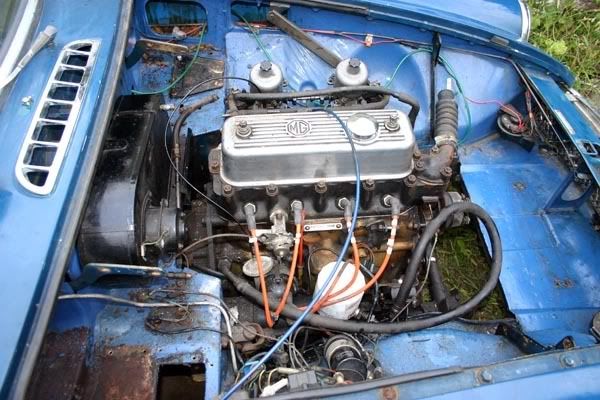
The only bad thing to report is that there is evidence of bodgery in the engine bay: the brush-painted panels (in the wrong colour), a brake servo held on with only one of the three bolts, assorted and wrong sized bolts here and there, other repainted items that haven't been stripped before being painted the wrong colour and evidence of items being painted without first having been removed.... I guess this is to be expected with an old car that's had quite a few owners over the years though! Never fear as this will all be put right as it gets reassembled and this will be greatly assisted by a bag of nuts, bolts and fixings that Simon handed over to me with the car.
Oh - there is one other thing to report: Mr ratty had indeed been at work, chewing through a few wires in the engine bay so I guess we'll wait and see what he's done to the dash wiring as well!
More pictures here.
Saturday, 3 July 2010
Cooling System Investigations
Encouraged by my success with the master cylinders today, I had some spare time and decided to investigate the condition of the cooling system.
I wasn't expecting too much good news as the failed core plug was found to be completely missing at the back of the engine block and also there was a large split in the bottom radiator hose.
The radiator was fairly easy to remove but when the hose was removed from the water pump, I found lots of nasty gunk in the pump's input hose:


So a new water pump and hose set go on the shopping list...
Also it's been bugging me a little that the engine bay has been painted the wrong colour, not just that but it's also been painted with a brush rather than sprayed so the finish is a little variable. When I took the master cylinders out this afternoon I also noticed that the area beneath them was rusty and in need of attention. Looking that the engine bay I've realised that once the engine's out, there's not much more work required to clear the engine bay of components so that it can be rubbed-down and re-finished.
Looks like this will be added to the list of jobs to do!
I wasn't expecting too much good news as the failed core plug was found to be completely missing at the back of the engine block and also there was a large split in the bottom radiator hose.
The radiator was fairly easy to remove but when the hose was removed from the water pump, I found lots of nasty gunk in the pump's input hose:
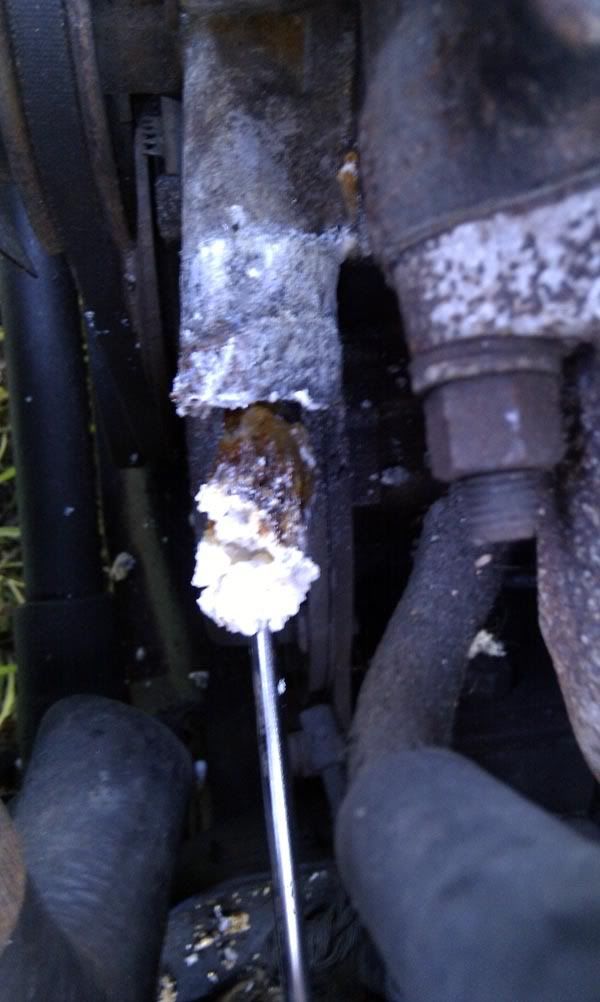
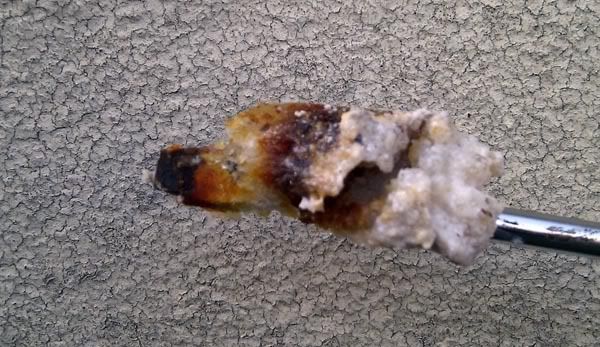
So a new water pump and hose set go on the shopping list...
Also it's been bugging me a little that the engine bay has been painted the wrong colour, not just that but it's also been painted with a brush rather than sprayed so the finish is a little variable. When I took the master cylinders out this afternoon I also noticed that the area beneath them was rusty and in need of attention. Looking that the engine bay I've realised that once the engine's out, there's not much more work required to clear the engine bay of components so that it can be rubbed-down and re-finished.
Looks like this will be added to the list of jobs to do!
Master Cylinder Overhauls
Having had a bit of a session on eBay yesterday, and with a clutch master cylinder kit arriving this morning, I decided to get the spanners out and remove the clutch and brake master cylinders.
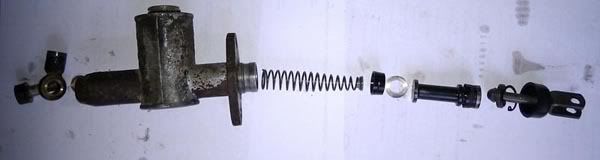
Removing the clutch m/c is a bit of a fiddly job - the pipe union came apart easily and the two bolts came undone OK (would it have killed MG to use captive nuts or bolts to attach these parts?!) but actually getting the unit out proved more difficult. In the end, I had to remove the circlip and withdraw the plunger to get it out albeit in two parts.
The brake m/c was a lot easier!Anyway, both items were dismantled, cleaned out with meths and prepped for painting. The seal kit that I'd bought turned out to the the wrong one (it only cost £3.25 on eBay!) so another one has been ordered. Here's the clutch master cylinder:

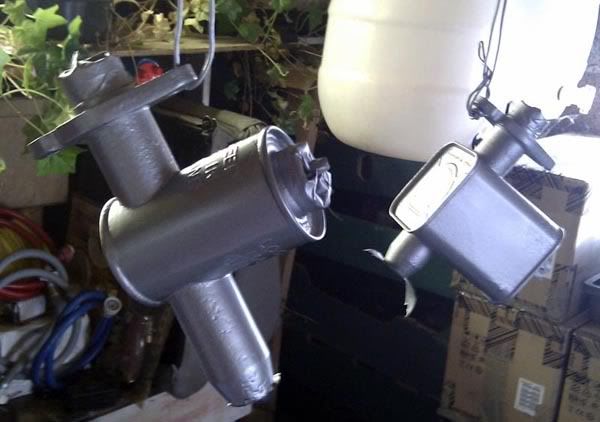
I've painted both items ready for re-fitting and will do so as soon as the seal kits arrive - here they are hanging up in my garage:

More pictures here.
Removing the clutch m/c is a bit of a fiddly job - the pipe union came apart easily and the two bolts came undone OK (would it have killed MG to use captive nuts or bolts to attach these parts?!) but actually getting the unit out proved more difficult. In the end, I had to remove the circlip and withdraw the plunger to get it out albeit in two parts.
The brake m/c was a lot easier!Anyway, both items were dismantled, cleaned out with meths and prepped for painting. The seal kit that I'd bought turned out to the the wrong one (it only cost £3.25 on eBay!) so another one has been ordered. Here's the clutch master cylinder:
I've painted both items ready for re-fitting and will do so as soon as the seal kits arrive - here they are hanging up in my garage:
More pictures here.
Subscribe to:
Comments (Atom)